Whether you need to replace faulty components such as the inner glass and door seal, or you simply want to give your appliance a more thorough clean, it can be incredibly useful to know how to remove your oven door. Luckily, this is usually a very simple and straightforward process for most ovens, so you won't have to worry about remembering any complicated steps or investing in special equipment.  So to find out how to remove and replace your oven door, keep reading:

How to Remove Your Oven Door:

  1. Make sure that your oven is switched off, disconnecting any power supplies. 
  2. Lower the oven door and inspect the hinge, this will let you know how to lock the hinges in place for removal.
  3. Lock the hinges in place either by: Turing the screw with a half turn (two-part hinge system), folding the catch over (one part hinge system), fitting a pin into the hole (pin type hinge) or by folding the latch back into the glass (latch over type).
  4. Once you have locked the clips, place your hands on either side of the oven door, lifting it to a 45-degree angle.
  5. Grip the sides of the door firmly, then gently lift the door upwards and out of the hinges. 

Replacing Your Oven Door:

Once you've successfully removed your oven door and completed your desired application, it should be fairly simple to replace your oven door by following the same steps in reverse:

  1. First, hold the door at the same angle with your hands at either side, before lowering the hinges into the slots. 
  2. Once the hinges are in place, carefully lower the oven door to horizontal level, so that it's in the same position as when you began removing it.
  3. Replacing the locking mechanism either by clipping it into place and/or replacing the screws.
  4. Examine the oven door before closing it, to ensure that it has been successfully reattached.
Remember, if you need to remove your oven door in order to replace it and/or any of its elements, be sure to check out our selection of oven spares to find quality replacements at a great price!


Here's a few extra things you may find when removing your oven door:

  • Gloves - These will help you to grip the door whilst also protecting your hands.
  • A Phillips-Head Screwdriver - This will come in handy if you need to pry the hinges out of their sockets, or if your hinges are screwed into place.
  • Hinge Lubricant - This will help to ease the hinge movement if it has become jammed or is very stiff.
  • A Pin or Allen Key - Some oven door hinges come with a hole that allows you to lock the hinges into place for removal.

If you need any further advice on how to remove your oven door, our friendly team of experts are happy to talk you through. Just give us a call on 02920 452 510.


Is your gas hob cooker starting to look a little rusty? Or do you find that the gas is starting to burn your pots and pans? If so, it may be time to look into getting a cooker ring cover to prevent your cooker from that damage. 

Cooker ring covers are used to protect all the inner workings of your cooker ring burner, so it is worthwhile getting one to increase the longevity of your cooker. The cooker ring on a gas oven is also known for tarnishing easily, so a nifty new cooker ring cover will have your cooker looking new again in no time at all. 

Here at Cooker Spare Parts, we stock a variety of different Cooker Ring Cover Replacements, suitable for all types of gas ovens and cookers. Here's a look at what we have to offer. 

Cooker Ring Covers


Rangemaster Cooker Ring Cover 72mm

This cooker ring cover is ideal for Rangemaster cookers. With a diameter of 72mm, this cooker ring cover will fit onto a semi-rapid burner easily, protecting the burner body underneath. This cooker ring cover will also allow heat to collect and be distributed evenly around the cap. 


Gas Hob Cooker Ring Cover

This cooker ring cover will not only protect the inner workings of your burner, but it will also help the heat produced by the gas burner to be spread around the pan evenly. This particular cooker ring cover is an authentic Stoves spare part and is also compatible with certain Belling appliances.

We have plenty of cooker ring covers in stock which you can browse here if you find these examples are not suitable for your cooker. To check a cooker ring cover is compatible with your cooker, make sure you enter the cooker model details into our homepage to check it is suitable. If you need advice from the experts, be sure to contact us on 02920 452 510. 

Oven Temperature Setting
 
Have you noticed that your electric oven isn't getting as hot as you need it to be? Is your food under-cooked even after the full recommended cooking period has elapsed? Does every meal you make 'needs a few more minutes' than expected?
 
If so, the root of the problem may be your oven's thermostat. If your oven thermostat is not reaching the set temperature it may be time to replace it, here's some information so you can work out if that is what is wrong: 
 

What does an oven thermostat do?

 
You can think of the thermostat as the supervisor of your electric oven.
 
On its own, the oven element (i.e. the part of your cooker that actually heats up) doesn't know how hot to get - it just starts heating up when you turn the appliance on. The thermostat's job is to know what temperature you've asked for, measure the heat in the oven, and tell the element to switch off once the required temperature has been reached.
 
Of course, when the element stops heating up, the oven will gradually begin to cool, and so the thermostat is also responsible for recognising when the temperature drops - at which point it will wake up the element again.
 

What can go wrong with the oven thermostat?

 
If the thermostat stops working entirely, then in theory the element will just continue to heat up indefinitely, getting hotter and hotter until it burns itself out.
 
However, if you're experiencing the issues we mentioned earlier - thermostat not reaching the set temperature, food taking too long to cook - it's likely that your thermostat has a rather different problem. A thermostat that is improperly calibrated may misread the temperature in the oven, deducing that it is warmer (or cooler) than it actually is.
 
Here's how that plays out in practice:
  • You set the oven to 220°C.

  • The oven element starts heating up.

  • Before the temperature in the oven reaches 220°C, the faulty thermostat mistakenly gets a 220°C reading and tells the oven element to switch off.

  • Your cooker tells you that it's finished preheating, so you pop your food in...

  • ...only to find at the end of the cooking period that your meal is only half-cooked because the actual temperature in the oven was lower than the temperature you set.

Can I fix this problem?

 
Depending on the type of cooker you own, If your oven thermostat is not reaching the set temperature it may be possible for you to recalibrate your oven thermostat by measuring the actual temperature in your oven manually (using an oven thermometer) and adjusting the thermostat as needed.
 
If you need to replace your thermostat entirely, you can buy a new one using the following links:
Image from pexels.com

Oven

 
Grill element not working? Unfortunately, even if you would rather fix something than buying a new part, a faulty grill element cannot be repaired due to its fragility from the heat. Therefore, if your grill element is blown there's not much that can be done to fix it other than replacing it with a genuine new grill element that's suited to your cooker. Luckily this post explains why it's broken, how to get a new part and how to replace this part!
 

Why Is My Grill Element Not Working?


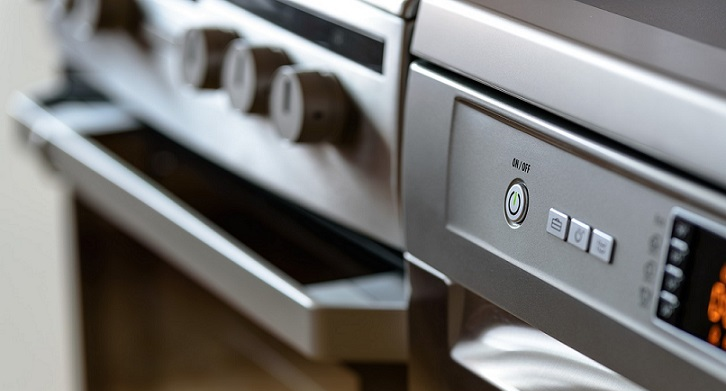
In an oven, the Grill Element is the wire that provides heat to the entirety of your oven while cooking. Your Grill Element could be broken due to a number of reasons, such as a blown fuse or just old age. Statistically, Grill Elements are the most easily broken oven parts due to their brittle nature. 

 
If you find that your grill element is not working, it should be easy to spot as your oven may not heat up at all. Other signs of a broken grill element include uneven cooking, or if you have an infra-red grill, the element not turning red while the oven is on. 
 

What Can I Do if My Grill Element is Not Working?

 
 As we explained above, unfortunately, it's not as simple as fixing a fault grill element, it's time to replace the part. Here at CookerSpareParts, we stock a wide range of Grill Elements suited to a vast range of different cookers so there's sure to be a replacement part for you. Be sure to check the Grill Element will fit your cooker by using out model checker on the homepage. Replacing your Grill Element is worthwhile and will save you buying a new cooker which could cost you hundreds. 
 
Grill Elements                               Model Checker


How to Replace Your Grill Element

 
To fix your Grill Element, here's a step-by-step guide on how to replace it with a new one.
 
  • Unplug your oven. If you leave your oven on, there is a high risk of getting shocked while fixing your grill element, so be sure to eliminate all risk of this.
  • Remove oven door. This will allow you access to the entirety of the oven. Cooker Doors are usually attached with latches, so just unlatch these to remove the door. 
  • Remove oven From the unit. This will make it easier to access the parts of the oven you need to. 
  • Detach the top panel and back panel of the oven. A screwdriver may be necessary for this part.
  • Move the insulation away from the oven.
  • Take a photo or note exactly how the faulty Grill Element is wired. This will be used when you attach your new Grill Element.
  • Remove the wires attached to the Grill Element. You can use pliers to make this part easier and a screwdriver may be necessary. 
  • Attach new Grill Element. Make sure this is the right way around and reattach the wires exactly as they are in the photo or your notes.
  • Re-attach shelves and cooker door. And ta-da, you're done!
You can browse our Grill Element replacement parts below, or if you have any questions feel free to get in touch on 02920 452 510. 

Click Here To View Our Grill Element Replacement Parts >

Can't find the part for your appliance, or need further help finding the correct grill element?

Don't hesitate to contact our sales team on 02920 452 510 or email us on enquiries@cookerspareparts.com with your model and serial number details.

Flame Failure Devices for Gas Cookers

The flame failure device is a critically important part of any gas cooker. If the cooker's flame goes out, the flame failure device is responsible for ensuring that the flow of gas to the cooker is cut off - a crucial safety measure that prevents the build-up of dangerous flammable gas.

If your cooker's gas supply keeps flowing even when the flame has been extinguished, this may mean that the flame failure device (FFD) in your appliance has stopped working, or is in some way faulty. If that's the case, you should definitely look to replace the part as soon as you possibly can.


Flame Failure Devices from Cooker Spare Parts


Here at Cooker Spare Parts, we stock a huge number of flame failure devices for all sorts of different cooker makes and models. Our range includes genuine spares from such household names as:
To order your replacement flame failure device, simply follow these instructions:
  1. Go the the Cooker Spare Parts homepage (here) and enter your manufacturer and model number in the boxes provided.

  2. Click the 'Search Parts' button to see a list of parts that are suitable for your appliance.

  3. Now, see where it says 'Select Part Type'? Use that drop-down menu to choose the specific sort of part you're looking for - 'Flame Failure Devices & Thermocouples' in this case.
You should now be looking at the FFD that is compatible with your cooker. All that's left to do is add it to your basket and complete your order!

Can't find the flame failure device you need for your gas cooker? Contact us today - we're always happy to assist!