Oven Maintenance Tips

As the old saying goes, “prevention is better than cure”, which so happens to apply perfectly when it comes to your cooker. By taking the necessary steps needed to avoid potential problems with your oven, you can save yourself a bunch of hassle, time and money trying to fix it up. So, what are the things that you need to be doing to ensure your cooker continues to run as efficiently as possible and avoids any unwelcome issues? Below we take a look at 10 essential oven maintenance tips.

  1. Check your oven door seal – Did you know that over 20% of an oven’s heat can escape if the doors are not sealed properly? This can and will result in incredible losses in efficiency, meaning your food is going to take a lot longer to cook – nightmare! To ensure your oven door seal is intact, simply open the door and feel the rubber gasket around the perimeter of the oven’s hatch to check for any broken, torn or worn sections. If you happen to find more than one broken area, then it is time to get your seal replaced! You can browse our range of replacement door seals & gaskets below.


  1. Clean your broiler pan – One thing is for sure; broiler pans can be a real pain to clean. Nobody wants to spend hours scrubbing off old, burned food do they? An easy solution to clean your broiler pan is to heat the pan up and then sprinkle some detergent on the affected areas. Cover the laundry detergent with wet paper towels and after around 15 minutes, remove the towels and scrub the food off easily.


  1. Salt a grease spill – Spillovers can be an annoying part of cooking, especially if you're making an effort to keep grease off of your cooking tray or dish. To make light work of cleaning up spills, simply sprinkle table salt over a spill before using your oven. Now, close the door and proceed to cook your food. When it’s finished, you might be surprised to see a tricky grease spill has turned into a cleanable pile of ash that can be easily swiped away.


  1. Oil your oven rack – If you want your oven racks to glide smoothly when taking them out and putting them back into your oven, then it’s important to not ignore them. Start by cleaning the oven wall ridges that the racks slide in and out on using soap-filled steel wool pads. Once the ridges have dried, wipe them over with some vegetable oil. Your oven racks should now glide on the ridges effortlessly.


  1. Cleaning dirty oven racks – An old but effective method of cleaning your dirty oven racks. Simply get a large, heavy-duty plastic bag and fill it with vinegar, dishwashing liquid and hot water. Then, place your oven racks inside, seal the bag and place it in a tub of warm water for an hour or so. Once this has been done, remove the racks from the plastic bag, scrub, rinse and dry. Your racks should now be just fine to use again. If you can’t get hold of a heavy-duty plastic bad, then you can use your bathtub instead. Simply fill the bath with soapy water to loosen the grime on your racks. The longer you leave them to soak, the easier it will be to get the grime off.


  1. Cleaning the inside of your oven – If your oven racks and clean(ish), but the rest of the inside of your oven isn’t, then you’ll be glad to know that there is an easy solution. Simply fill a microwave-safe bowl with water and turn your oven on a high temperature for two minutes. Now, turn your oven off and leave it for a further two minutes. You can now open your oven door and using a sift rag, begin to wipe the muck on your oven walls off.


  1. Removing embedded food – Removing food from your oven that has been caught in between the racks can be a real pain, but it really doesn’t have to be. To get the food out, all you need is an ordinary plastic nail file and a damp cloth or newspaper bail. Attache the cloth or newspaper to the nail file and place in between your oven racks. The trapped food should attach and be easily lifted out.


  1. Regular stain removal – You may be surprised to learn that newspapers actually work a lot better to clean your oven than a sponge. Try making a ball from a few sheets of newspaper, soak it in soapy water and rub your oven down with it. The burnt food and stains should easily wipe with minimal fuss and effort. A good tip to remember when cleaning the inside of your oven is to not wait for your oven to cool down. The longer you leave cleaning your oven once it has been turned off, the harder it will be to remove dirt and stains. Burnt food is a lot easier to remove while the walls are still warm.


By following these essential cooker and oven maintenance tips, you will go a long way to ensure that not only does your cooker continue to work at its optimum level, but the chances of damage and fault are dramatically reduced. If things are already looking bleak for your cooker and you require quality replacement parts to get it back and running, then Cooker Spare Parts are here to help!

We offer an extensive range of replacement parts for a wide variety of cooker models, so no matter what you need, we are confident that you’ll find it here. Click below to browse our spare parts. For more information on any of our parts or on our oven maintenance tips, then please do not hesitate to get in touch with a member of our team today.

Browse Our Replacement Cooker Parts >

Cleaning an oven is an unenviable task that commonly finds itself high on the list of hated household chores.

Dirty, boring and laborious, it’s a duty that tends to be avoided at all costs, unless absolutely necessary.

That being said, when needs must, productivity often hits a roadblock when it comes to cleaning the oven door.

Keep your oven from becoming a culinary crimes scene with this handy guide to cleaning oven glass.


cleaning oven glass, clean glass oven door, cleaning oven door


Cleaning Oven Door Glass

The ability to clean the glass of your oven door can make or break your oven cleaning endeavour.

Unsightly drips and noticeable streaks are far from an uncommon occurrence on oven glass and can leave your oven appearing grubby, even if the inside itself is actually spotless.

However, oven glass accessibility isn’t always simple and can take a lot more effort than simply spray, scrub and wipe.

If your oven door glass playing hard to get, you may need to be a little creative in your approach. Luckily, there’s a tried and tested formula for just that.


Hang in There

Oven doors are notoriously tricky to clean, particularly when it comes to maintaining the transparent glass front.

Worse still, oven doors often comprise of multiple layers, a myriad of parts and a multitude of intricate fastenings holding it all together.

Avoid the headaches of dismantling and horror of reassembling your oven door by using this handy coat hanger hack.


Hang Fire

Before you do anything else, you’ll need to make your coat hanger contraption.

Straighten out a metal coat hanger and wrap a glass cleaning wipe around it, securing it in place with an elastic band.

Hey, presto – one wiry cleaning wand!


Infiltrate

Most ovens will have a drawer or casing below the oven door itself.

Remove this front panel to reveal the oven door’s exposed inner workings. This will give your additional access to the oven door, including the usually inaccessible oven glass.


Behind Enemy Lines

By laying under the now exposed door base, you’ll now be able to see open slots, giving you access between the oven and the window glass.

Slide the wire cleaning wand into the gap and simply wipe away the dirt from the grubby area.

For dirty glass, this may take a couple of goes with several new wipes – but be persistent. The result will be worth the effort!


Fall Back

Once clean, simply remove the wand and bask in the glory of a job well done!

When you pull out the hanger and see how much dirt has been removed by the glass wipes, you’ll be amazed at how effective this simple technique can be.

And all without removing a single screw!


For more information on oven cleaning, why not check out our other oven cleaning blogs for more hints, tips and hacks. Alternatively, if your oven is beyond cleaning and you’re in need a replacement part, call now on 02920 452 510 or get in touch online using the button below.

Get in Touch

Those that spend a lot of time in the kitchen will know all too well that cooking appliances are far from perfect.

When it comes to ovens, they are by no means an exception to the rule and this fact also extends to the oven knobs attached to the cooker.

Many oven knobs have the temperature markers printed onto the dial itself. As such, the likelihood you may rub out some of the markings over time is pretty high.

That being said, just because your cooker knob is missing its markers doesn’t mean you have to lose your marbles. There are a couple of handy hacks that can help you get dialled up again.


oven knob missing, cooker knob missing


Replacing the Numbers

Most ovens and cookers will have either a chrome, black or white front, with knobs of the same colour at the top of said oven.

A quick and easy albeit temporary workaround to this issue is to simply Google the make and model of your oven for an image of the cooker front. Assuming you can get a visible look at the dials, you can then proceed to mark on the key temperatures.

If you can’t locate a legible image, you may be able to find a usable depiction of the dial in the oven’s manual. While the images can vary from the real thing at times, it should give a decent idea of what temperature is marked where.


Replacing Numbers on Black Oven

For a white or chrome coloured oven front/knob, a black Sharpie is ideal; however, this can be a little more difficult if you have a black cooker. Try using a Tippex pen or a silver Sharpie.

If heat is a concern and you suspect that may be the reason behind your missing markings to begin with, it may be worth using heat-resistant paint – such as paint for ceramic tiles – or even nail polish.

If all else fails and you know you plan on replacing it, you may want to simply score in line markers over key temperatures with a sharp instrument as a means of keeping track.

While none of these solutions are ideal, they do provide a decent quick-fix that will see you covered for the interim until a replacement arrives.


Gauging Temperature

If you don’t have any imagery available and you really are stuck when it comes to what temperature marking goes where, all hope is not lost just yet – it’s time to go old school!

If your oven comes equipped with an oven thermometer, trial and error can get you where you need to be. Simply, turn the dial to where you roughly believe your most commonly used temperature is (e.g. 180), wait for the oven to heat up and check the thermometer.

After a handful of tweaks and retests, you should have a good idea what’s where and can mark accordingly using one of the methods above.


Replacing an Oven Knob Missing Markers

While the above techniques can be handy as a short-term stop-gap to keep your kitchen running, your oven cooking and your food the right side of cremation, your best bet is to order a replacement oven dial if your cooker knob is missing its numbers.

Luckily, you can replace a cooker knob with ease at Cooker Spare Parts. Simply head over to our Cooker Knob section, type in the make, locate the model you need and click the product you want to order – job done!


For more information on cooker knobs and replacement oven parts, drop us a line today on 02920 452 510 or click the button below to get in touch online.

Get in Touch

A noisy oven can be a major annoyance for any homeowner, particularly if you spend a lot of time cooking or hanging out in the kitchen.

However, a riotous racket from your cooker could be an indication of something far worse than just audio irritation.

If your oven is turning your kitchen into a clamorous karaoke of cooker noises, don’t chalk it up to being “one of those things” – it’s likely a sign that your oven is need of some overdue TLC.


why is my oven so loud ,noisy oven


Investigating a Noisy Oven

In addition to ruining the kitchen ambience with its dinnertime din, a loud cooker can also raise serious alarm bells over the health of your appliance.

A noisy oven can be a tell-tale sign of a serious problem with your cooker. Think of it as a cooker’s cry for help and your oven’s way of alerting anyone in earshot that it’s in dire need of assistance.

If your oven is making such a piercing plea, don’t read it the last rites and fork out on a replacement. The solution could be a lot simpler and a lot less expensive!


Diagnosing a Noisy Oven

More often than not, an uncharacteristically noisy oven typically points to an issue with the oven’s fan motor. That being said, most ovens have two fans: namely the cooling fan and the circulation fan.

Like any appliance, these components can and will wear over time as they reach the natural end of their lifespan. For oven motors, this often causes them to make a loud rattling noise when the oven is on.

To get to the bottom of it, it’s time to channel your inner sleuth and get inspecting. But remember, safety first, kids - be sure to disconnect your appliance from the mains before you do so.


Fixing a Noisy Oven

A noisy oven fan can be the result of something as simple as a loose blade or fixing nut. To eliminate this possibility, it’s worth tightening any loose screws/bolts to ensure everything is securely held in place.

Oven fans usually consist of three separate parts: the fan motor, the blade and the fixing nut. If all parts are securely in place and the noise still persists, you may need to replace a fan part.

If you have diagnosed your issue and would like a replacement fan/motor component, click the button below to browse our stock of replacement parts.

Browse Oven Fan Motor Parts


Replacing an Oven Fan

Once you’ve diagnosed the problem and identified the part that needs attention, you can now tackle the task of solving the issue and replacing the problem part. That being said, it’s often not as easy as you might think.

Replacing an oven fan can be both difficult and dangerous, particularly if you don’t know what you’re doing. What’s more, with so many oven brands, models and variations on the market, prior maintenance knowledge of one oven can be entirely different for another.

A botched DIY job could void your warranty, while a failed attempt of fixing the issue could exacerbate your problems even further. As such, if you’re unsure, your safest bet is to call in a pro to check it out for you.

That being said, if you are intent on flexing your mechanic muscles and intent on doing your own oven overhaul, be sure to do your homework beforehand. Consult your manual and research your oven’s make and model thoroughly before getting your hands dirty.


For more information on fan motors and oven fan parts, call now on 02920 452 510 or use the button below to drop us a message online.

Contact Us

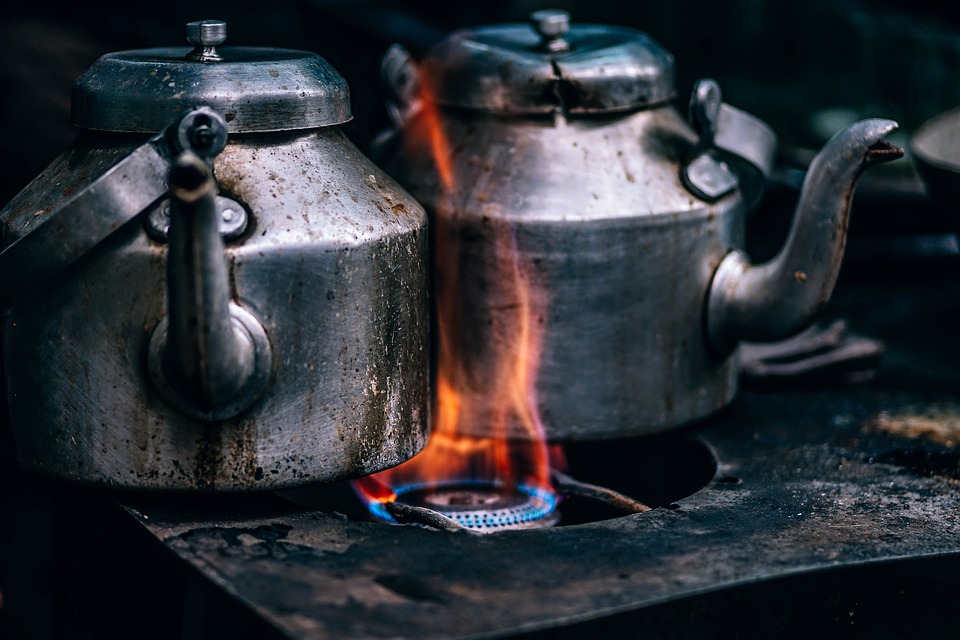
When it comes to cooking do’s and don’ts, there’s a long and varied list of things that can (and usually will) go wrong – particularly if you’re a white belt in culinary kung fu.

Luckily, the trusty oven usually provides a fantastic “Get Out of Jail Free” card for anyone who has not quite graduated from the foundation level of student cooking standards.

That being said, oven cooking isn’t always as simple as throwing a few potato smilies in with a fistful of fish fingers; there are still plenty of problems that can arise from even the simplest of oven cooking.

To help prevent any catastrophic kitchen nightmares, we’ve collated a mini list of oven cooking do’s and don’ts to stop you getting hot under the collar and keep mealtimes casualty-free.


cooking do’s and don’ts,cooking do’s,cooking don’ts


Cooking Do’s

It’s often said that a bad worker always blames their tools. While this may be true at times, it’s far from the rule. After all, sometimes the tools really are to blame!

When it comes to the kitchen, the tools at your disposal can make all the difference and an unreliable appliance can hold the fate of your meal in its molten, steely hands.

With that in mind, here’s a few preparatory pointers to help keep you cooking and set your nutritional voyage off in the right direction.


DO use timers and clocks

Keeping track of cooking times can be the difference between bon appetit and burnt offerings. Worse still, failure to set your alarm can be a real recipe for disaster when it comes to kitchen safety.

To keep your meal prep running like clockwork, make the most of your oven timer. This can be invaluable when you’re cooking a variety of dishes: whether you're frying a steak, boiling pasta of roasting a Christmas turkey.


DO keep your oven in working order

Figures published by Which? in 2018 showed that cookers and ovens were the cause of 11% of house fires, more than any other cooking appliance.

Meanwhile, GOV.uk maintains that cooking appliances account for a sobering 48% of all house fire ignition from April 2017 to March 2018.

Bottom line: keep your oven in working order. Failure to do so could not only land you in hot water but could quite literally see your home go up in smoke.


DO use oven mitts and handles

While it may seem logical to use a wet mitt or cloth to protect yourself when handling hot pans and trays, heat travels extremely fast through wet material, leaving your hand unprotected.

Always use a dry oven mitt (or, if absolutely necessary, a dry tea towel) to handle hot items. This should provide ample insulation to prevent your hand from the burning.

The same also applies for grilling. If you don’t already have one, avoid feeling the burn by taking additional precautions and investing in a pan handle for your grill.


Cooking Don’ts

Isaac Newton rightly once theorised that for every action, there is an equal and opposite reaction. In the kitchen, this is just as applicable and for every “DO”, there’s an equally important “DO NOT”.

So open wide and prepare for a freshly baked batch of sugary glazed “DO NOTS”, as we run down a five culinary faux pas that you’d be wise to avoid.


DON’T use ovens with damaged doors

The smallest crack could lead to big safety issues once temperatures rise and can even cause your oven glass to break completely.

Similarly, microwaves with damaged doors can be just as dangerous, if not more so. An unsealed microwave door can lead to radiation emission that has the potential to provide a nasty burn.

To play it safe, if your oven door is faulty, be sure to get it replaced or fixed before you turn up the heat and get cooking.


DON’T overload your oven

Overloading an oven can not only increase cooking time, it can also affect how your items cook, preventing heat from adequately circulating.

More importantly, it can also increase the risk of a hazard, especially if you’re trying to cram too many items on a single tray (we’ve all been there).

If your oven is beginning to look like a game of Tetris at mealtimes, it may be worth investing in additional oven trays and grill pans to avoid unnecessary stacking.


DON’T ignore a wobbly cooker

If you have a free-standing oven, a wobbly cooker can be a major annoyance at the best of times. Worse still, it can be extremely dangerous at the worst.

Wobbly ovens often mean an unstable stove. When you subsequently use that stove, it can become very dangerous very fast, particularly when you’re using the stove for boiling water, soups and sauces.

Spills and mishaps can occur with effortless ease when your cooker is unsteady. Avoid a rocky horror kitchen stove by securing your free-standing cooker with level cooker feet.


For more information on safe oven cooking and cooker maintenance, why not drop us a line today? Call now on 02920 452 510 or use the button below to get in touch online.

Get in Touch