Are you constantly battling with the fact your oven door won't close? If your oven door isn't closing properly, crucial heat will be allowed to escape your oven, increasing your cooker times as well as your blood pressure. No-one likes having to wait for their food to be cooked.
If you're tired of having to use excessive force to open or close your oven door, or you're fed up of having to wait for an eternity for your meals to be cooked, you may be tempted to just get rid of your cooker and replace it with a newer model - but this an expensive and time consuming solution to your problem.
To fix your oven door that won't close, there is a far cheaper and easier solution to the problem. Instead of replacing your entire cooker to fix an oven door that won't close, you can simply replace the parts that are causing you to struggle with closing your oven door. To do this, it's as simple as taking a look inside your oven, unscrewing the hinges and replacing them with new ones.
Luckily for you, here at Cooker Spare Parts, we have an excellent selection of
Oven Door Hinges and
Cooker Door Catches that cost a lot less than a cooker and are a lot easier to install. If you're looking to resolve this problem, it's important that you replace the parts that are faulty as soon possible!
Over a period of time, your oven door hinges may become faulty due to always in constant use and general wear and tear. A faulty oven door hinge may make it difficult to open and close your oven door; and therefore, it's wise to replace it if it becomes faulty. If you're looking for a new oven door hinge to fix your oven door that won't close, we're confident you'll find the perfect, high-quality replacement that is also great value for money. To view our range of
Oven Door Hinges, please
click here.
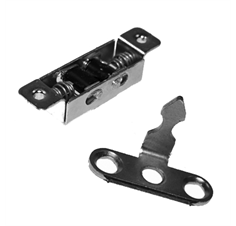
Another cooker part that can fix the problem of an oven door that won't close is a replacement cooker door catch. Similar to your oven door hinge, your door catch can also become faulty over a long period time. You may think that your cooker door catch is unimportant but if it's preventing your cooker from preventing your cooker door from closing then you should strongly consider replacing it as it may be causing your oven or grill to take longer to cook your meals. We have a huge range of cooker door catches for you to choose from, to view our selection of
Cooker Door Catches please
click here.
If you wish to get in touch, please do not be discouraged to give us a call on
02920 452 510 or email
enquiries@cookerspareparts.com - we'd be more than happy to help you with any issues you may be having whether its that your oven door wont close or anything else!
Your fan oven element is arguably the most crucial part of your cooker. It has a very important job, and that is to produce the heat that actually cooks your food. What good is an oven without heat?!
If your oven isn't heating up, the problem is usually that the element has blown or otherwise become faulty. (Seeing bright spots and/or patches on your element when it is in use is a pretty good sign that something has gone wrong.) As you can't really repair it, chances are you'll have to
replace your fan oven element. If your element
has stopped working, there's no need to stress - we have a HUGE array of
Fan Oven Elements in stock here at Cooker Spare Parts, and we're confident that we can get your oven firing on all cylinders once again. To view our excellent selection of fan oven elements, please
click here.
Once you've purchased yourself a replacement fan oven element, the next thing to do is install it! Of course, not everyone is a cooker expert, and we understand that you may need a little help. That's why we have created this simple-to-follow guide that will help you to replace your fan oven element with ease.
How To Replace Your Fan Oven Element:
- Before you start any work, please make sure that your oven is turned off on the wall. We don't want you to electrocute yourself.
- Once your oven is safe to work on, you can remove your oven door and shelves - this will make it easier for you to access the fan oven element itself. To remove your oven door, simply move the latch to the open position on your hinge. Next, close your door and lift it out - but please be careful when lifting out your oven door, as the last thing you want to do is drop it and shatter the glass.
- Now that there's nothing getting in your way, you can remove the front panel that is protecting the oven fan and element. This is usually held in place by four screws. Remove the screws and panel - but be careful not to lose any of the screws!
- Right, now that the front panel has been removed, you can remove your faulty fan oven element. This will be held together by three screws; remove these screws and take the element out. You'll notice that there are some wires attached to your element - we'll tell you what you have to do with them next.
IMPORTANT NOTICE: Before following the next step, please take note of the order these wires. We recommend taking photos of them before you pull them out.
- The wires will be attached to your element via spade connectors. All you need to do is pull them out, but be careful - you don't want to damage the wires.
- Now that you've disconnected your element, it's time to connect up your new one! Using the photo you took on your phone as a reference, re-attach the wires; then screw the element and front panel back in place; finally, place the shelves back inside your oven and re-attach the door.
Congratulations, you've just replaced your oven element! Make sure to brag to all your friends about how handy you are.
If you're having trouble with any of the steps to replace your fan oven element, please do not hesitate to
contact us - a member of our customer service team will be happy to go through the process to ensure your element is installed without any problems.
Your oven thermostat is very important; it is responsible for ensuring that your oven heats up to the set temperature and that it remains regulated at all times. That's why it's important to know how to replace your oven thermostat if you find it is no longer working.
If your cooker is overheating or isn't heating up sufficiently there could possibly be a problem with your thermostat. This is when you should look to purchase a replacement.
Here are the signs to look out for to confirm you need to replace your oven thermostat:
- Temperature inside oven cavity seems to be far too hot
- The temperature inside the oven does not reach the level you've set it to
- There's no click when you turn the control knob
Luckily we stock a wide range of replacement oven thermostats here at Cooker Spare Parts. To browse our selection please click here.
Now that you've purchased your oven thermostat, the next step is replacing it - but if you're not a cooker expert, this can be difficult. This is where Cooker Spare Parts comes in to help! Below, is an easy to follow step-by-step guide that will instruct you through the process of how to replace your oven thermostat.
Step-by-Step How to Replace Your Oven Thermostat
- Safety first! Please ensure that your cooker is switched off at the mains before you begin to replace your oven thermostat.
- Next, locate the thermostat that is currently fitted to your cooker. The control of your oven thermostat is situated behind your control knob, and the capillary tube is situated at the top of your oven cavity.
- To get to the back of your cooker if you have a built-in oven, you'll need to remove it from its cavity. To do this, remove the fitting screws - located on the rim of your oven - and unplug the cables. Then you can lift it out of the cavity.
- The next step in how to replace your oven thermostat is to remove the oven door. To do this, move the latch on your hinge to the open position; close the door up, and then lift it out.
- Unclip the capillary tube. Now that you can access the inside of your oven, you can now remove the thermostat's capillary tube which is situated at the top, and back of your oven. To remove it, simply un-clip it, move it around and let it hang in your oven.
- Next, remove your back and top oven panels. These may be held together by Torx screws, so it may require you to have a Torx set.
- Remove the capillary tube. Now that you have access to the back of your oven, you'll be able to see the wire feeding from the top and around your oven, and into the oven cavity. Pull the capillary tube out of the oven cavity.
- Now, you need to remove the fixing bracket that is keeping the wire of the thermostat in place. This again requires Torx screws.
- It's now time to remove the control of your thermostat. Before removing anything, we strongly recommend you take note of how the wires fitted; so when you come to rewire your new thermostat, you can do it in the same way.
- Take a photo of how it is wired. Once you have taken note of how it's wired, you can remove the clips and the control knob.
- Remove the screws that are holding the thermostat control in place. Then you can simply remove the thermostat from the control panel.
- Finally, to replace your oven thermostat, just do the opposite of what you have just done - fix it to your control panel; rewire it; feed the wire through and fit the capillary tube back into the oven cavity, and fix everything back together.
If you have any questions regarding how to replace your oven thermostat, please do not hesitate to contact us by calling 02920 452 510, or email enquiries@cookerspareparts.com - one of the cooker experts that make up our customer service team will be more than happy to assist you!