When someone is cooking up a storm in the kitchen, there are few things that compare to the sweet, sweet aroma of a finely cooked dish.

Whether it’s a freshly made sauce on the stove, a roasting chicken in the oven or even the scent of toast gently browning in the toaster, the slightest whiff can get the taste buds tingling and the mouth salivating.

That being said, the cacophony of odours can create quite the aromatic cocktail over time and leave you with a less than harmonious oven smell (particularly when it comes to fish and meat).

Avoid a smelly oven with these tips to keep your oven smells under control.


oven smells, oven smell, smelly oven


How to Remove Odours from your Oven

When your oven smells become too much to handle, you can deodorise an oven in a number of different ways; however, you don’t even need to reach for the industrial power of chemical oven cleaners to do so.

In fact, perhaps the quickest and easiest way to neutralise your oven smells is to enlist a helping hand from Mother Nature. Here are three sure-fire techniques to rid your oven of its nasty odours naturally.


Lemon

A great natural way of getting rid of oven smells is to enlist the awesome citric power of lemons. In addition to smelling great, they also make for a great way to loosen grease for a one-two punch of citric power.

First, fill a large oven-proof dish with about an inch or so of water. Next, slice two or three lemons in half and squeeze the juice into the dish, placing the squeezed lemon halves into the dish as well.

From there, simply pre-heat the oven to 120 C, place the dish on the rack and leave it to boil over for up to an hour, depending on the extent of the smell. Voila – one citrus fresh oven!


Vanilla

Another fantastic natural ingredient for masking odours, vanilla is a great alternative for a sweet-smelling kitchen.

Simply mix a teaspoon of vanilla extract with a small bowl of water and mix. Dip a cloth into the mixture and ring out the excess water until you’re left with a damp cloth.

From there, use the damp cloth to wipe down the inside of the oven, making sure to cover all walls, roof, base and racks. Repeat this process two or three times to ensure the whole oven is appropriately coated.

Much like the lemon method, you can also use the evaporation technique to deodorise your oven. Simply follow the same steps using an oven-proof dish and an inch of water, replacing the lemon juice for a teaspoon of vanilla extract.


Oranges

Much like lemons, the citrusy goodness of oranges makes them the perfect weapon for a fresh smelling oven.

However, unlike the lemon method, you only need the peel for this approach (so feel free to snack on the juicy segments while you prep).

All you have to do is peel an orange and place the skin on a baking tray in the oven. Leave them to bake for up to an hour and – hey presto – you should be left with an odourly wonderful tropical scent.


So, there you have it: three unbelievably easy ways to rescue your smelly oven from the stench of defeat. If your oven trays, racks and pans are simply beyond saving, you can always get a replacement here at Cooker Spare Parts. Click below to get in touch today.

Contact Us

Has your Zanussi oven stopped working? There's a long list of reasons why your oven has become faulty, but fear not. We can help you determine the root of the problem and advise you on the best way to fix it. 

Zanussi Oven Not Getting Hot

If your Zanussi oven is warming up a little, but not getting as hot as it should be, then it's likely that your thermostat is faulty.

The thermostat in your Zanussi oven regulates the internal temperature, so if you suspect yours is damaged or broken, you should stop using your oven and resolve the problem immediately. Continuing to use your Zanussi oven with a defective thermostat is a serious safety risk! 

At Cooker Spare Parts we offer a selection of thermostats for Zanussi's gas and electric ovens. We're sure you'll be able to find the part you need in a few simple clicks. You can browse our selection of Zanussi thermostats by clicking the appropriate buttons below:

Gas thermostats >      Electric thermostats >

Need help fitting your new thermostat? We've got you covered! Take a look at our step-by-step guide, we'll walk you through the process.

Help me fit my thermostat >

Zanussi Oven Not Working At All

If your Zanussi oven is not heating up at all then it's probable that your oven element is broken. 

If your oven is switched on at the mains, turned on as usual and supposedly 'ready to go', then it should definitely be getting hot! If for you, this isn't the case, then a new oven element is definitely on the cards. Luckily, replacing your oven element is fairly simple and they're not too expensive to replace. You can view all the Zanussi oven elements we offer by clicking the button below.

Zanussi oven elements >

If you find that these spares don't resolve the problem with your Zanussi oven, all hope is not lost! We have a huge range of spare parts for Zanussi ovens. Browse all of them here:

All Zanussi spare parts >

If your cooker hood's extraction power is at an all-time low, it's probably time to replace some parts and give it a bit of TLC. Cooker hood filter replacement is a fairly simple task, just follow these steps and your kitchen will be steam and smell free again in no time! Note: most cooker hood filters need replacing every four to six months.

To Replace Your Cooker Hood Filter

You Will Need:

  • New filter (grease or carbon filter, depending on hood model & cooker type)
  • Screwdriver
  • Optional: warm soapy water, rubber gloves

Step 1: Preparation

Before making a start on your cooker hood filter replacement, there are a few things you need to do. Firstly, take a look at your cooker hood and make sure you've purchased a compatible replacement filter. You can find a huge selection of replacement filters to suit your cooker hood here, in our range of cooker hood filter spares.

Once you've got your spare filter, you need to disconnect your cooker hood from the mains (we don't want any nasty shocks here!)

Step 2: Pop the hood

Your cooker hood probably isn't going to pop open like a car bonnet... but the same principle applies!

Grab your screwdriver and unscrew any screws that prevent you from accessing the cooker hood filter. (Now's also the time to put those rubber gloves on if you don't want to end up with grubby, greasy hands).

Step 3: Replacement time!

Once your cooker hood is suitably dismantled, it's time to have a look at the damage inside. If your cooker hood hasn't been working as it should for a while, it's likely you'll see a nasty buildup of grease over the cooker hood filter. 

  • Unscrew/unclip the existing filter.
  • Take it out of the cooker hood and discard.
  • Fit your new filter in its place. If you've got a universal filter, you may need to cut it down to size.
  • Screw or clip the new filter in place, making sure it's secure.

Some cooker hood models will have a metal grease filter rather than a typical fabric one. These filters can be removed, rinsed using a warm soapy solution, left to dry and re-inserted back into your cooker hood. Simple!

So there you have it, cooker hood filter replacement in just a few easy steps. If you have any questions, or if you need help finding the right cooker hood filter replacement for your cooker, don't hesitate to get in touch with us. Call us on 02920 452 510 now!

Those that spend a lot of time in the kitchen will know all too well that cooking appliances are far from perfect.

When it comes to ovens, they are by no means an exception to the rule and this fact also extends to the oven knobs attached to the cooker.

Many oven knobs have the temperature markers printed onto the dial itself. As such, the likelihood you may rub out some of the markings over time is pretty high.

That being said, just because your cooker knob is missing its markers doesn’t mean you have to lose your marbles. There are a couple of handy hacks that can help you get dialled up again.


oven knob missing, cooker knob missing


Replacing the Numbers

Most ovens and cookers will have either a chrome, black or white front, with knobs of the same colour at the top of said oven.

A quick and easy albeit temporary workaround to this issue is to simply Google the make and model of your oven for an image of the cooker front. Assuming you can get a visible look at the dials, you can then proceed to mark on the key temperatures.

If you can’t locate a legible image, you may be able to find a usable depiction of the dial in the oven’s manual. While the images can vary from the real thing at times, it should give a decent idea of what temperature is marked where.


Replacing Numbers on Black Oven

For a white or chrome coloured oven front/knob, a black Sharpie is ideal; however, this can be a little more difficult if you have a black cooker. Try using a Tippex pen or a silver Sharpie.

If heat is a concern and you suspect that may be the reason behind your missing markings to begin with, it may be worth using heat-resistant paint – such as paint for ceramic tiles – or even nail polish.

If all else fails and you know you plan on replacing it, you may want to simply score in line markers over key temperatures with a sharp instrument as a means of keeping track.

While none of these solutions are ideal, they do provide a decent quick-fix that will see you covered for the interim until a replacement arrives.


Gauging Temperature

If you don’t have any imagery available and you really are stuck when it comes to what temperature marking goes where, all hope is not lost just yet – it’s time to go old school!

If your oven comes equipped with an oven thermometer, trial and error can get you where you need to be. Simply, turn the dial to where you roughly believe your most commonly used temperature is (e.g. 180), wait for the oven to heat up and check the thermometer.

After a handful of tweaks and retests, you should have a good idea what’s where and can mark accordingly using one of the methods above.


Replacing an Oven Knob Missing Markers

While the above techniques can be handy as a short-term stop-gap to keep your kitchen running, your oven cooking and your food the right side of cremation, your best bet is to order a replacement oven dial if your cooker knob is missing its numbers.

Luckily, you can replace a cooker knob with ease at Cooker Spare Parts. Simply head over to our Cooker Knob section, type in the make, locate the model you need and click the product you want to order – job done!


For more information on cooker knobs and replacement oven parts, drop us a line today on 02920 452 510 or click the button below to get in touch online.

Get in Touch

Anyone that has ever crossed paths with an oven will be well aware of the adjustable rack positions within them.

However, did you know that the positions actually play a pivotal role in the cooking process?

When it comes to choosing top, middle or bottom in your oven, you don’t have to strike it lucky with guesswork. There’s actually a defined method to the ovenary madness.

Don’t let your culinary dreams go up in smoke or fall foul to a half-baked approach. Get the hot take on oven rack positions and keep your mealtimes piping hot and cooked to perfection.


Oven rack with baking biscuits


Is Oven Rack Position Important?

In a nutshell – yes!

The placement of the right food on the right rack can be the difference between good eating and good riddance.

As a general guide on how to best utilise a multi-rack oven, the following dishes are placed on these racks for optimal cooking.


Bottom Oven Rack

Theoretically providing the closest proximity to the heat source, the bottom rack is perfect for foods that require intense heat for a short period of time. As such, this rack position is ideal for dishes like pizza and flatbreads.


Middle Oven Rack

The go-to position for most items of food, this is the safest bet for oven cooking items for an even finish – ideal for pies, pastries and lasagnes. This position allows the hot air to circulate around the food freely and fairly for a balanced bake.


Top Oven Rack

If you wish to use your oven for the purpose of grilling food, you’ll need to familiarise yourself with the top shelf. This will give you direct access to the grill element on the roof of the oven. In the US, this is commonly referred to as “broiling”, so don’t be alarmed or confused if you stumble across the term “broiler” – it basically means “grill” to anyone outside the United States.


Is Oven Rack Position Important?

Naturally, oven models can and usually will vary from one brand to the next and you may find your oven features multiple levels outside of the simple top/middle/bottom trifecta. These are commonly found in between each of the aforementioned positions.

These mid-level settings allow for additional flexibility when cooking bulkier items, such as casserole dishes and large meats, while they can also provide a great middle-ground should you want to adjust your bake during cooking (e.g. lower the level if your food starts to burn).


The Golden-Brown Rule

A great rule of thumb when it comes to identifying which rack to use for your dish is to simply identify how you want your item to be cooked.

If you want the bottom of the food to brown, place low in the over; for the top to brown, place high; and, for the best of both worlds, place in the middle.


Cooking with Multiple Oven Racks

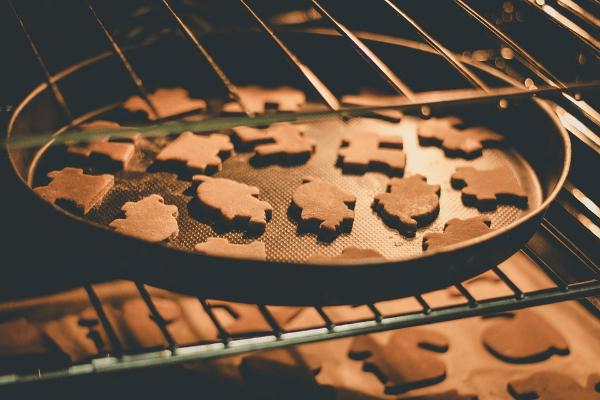
Having additional racks in the oven can provide a great way to cook several things at once. This can be particularly useful if you are cooking in bulk; e.g. baking several trays of cookies or multiple pizzas simultaneously.

However, when you do utilise the additional oven racks for cooking a variety of things at the same time, it’s worth keeping the following points in mind.


Food Placement

Theoretically As previously mentioned, cooking your food on varying levels of the oven can achieve a varying result, with the higher level resulting in a different finish than the lower. For an even bake, it may be worth moving your trays around midway through to ensure all items are cooked equally.


Cooking Time

Additionally, it’s worth remembering that food takes longer to cook the more items you have in your oven. It’s widely believed that two dishes will take 15% longer to cook than one: so, if you’re pizza was to take 10 mins by itself, cook for an additional minute and a half.


Multiple Oven Racks

Cooking with additional racks in the oven can not only make life easier for cooking in general, it can be a great solution for entertaining guests and catering for additional mouths to feed.

Don’t give your oven an easy ride. Get the most out of your oven by making sure you have the right equipment for the job.

If your grills, pans and oven trays are looking a little worse for wear or you simply want a couple of extra layers to add to your oven, head over to our replacements page now and bring your oven cooking experience to a whole new level today!


For more information on oven accessories and replacement parts, why not get in touch to find out more? Call now on 02920 452 510 or click the button below to drop us a message online.

Contact Us